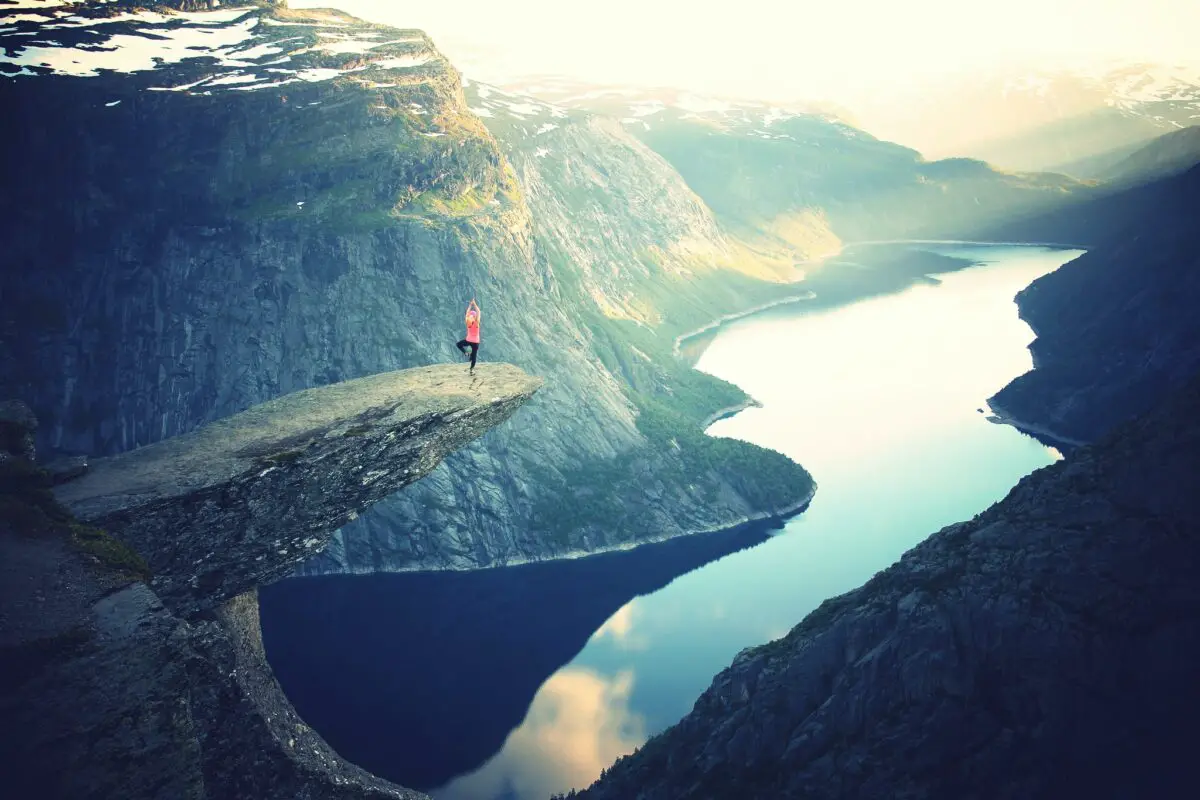
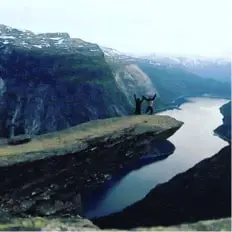
Trolltunga in Norway is one of the most recognised rocks in the world and for good reason. The spectacular rock (1,100 metres above sea level) juts out at a horizontal angle above Lake Ringedalsvatnet and has become one of the most instagrammed rocks in the world!
There’s no denying that the rock makes for a spectacular and jaw-dropping photograph, particularly when there’s the rather alarming sight of a tiny person teetering on the edge of the precipice! However, is the rock as remote as it appears to be on photographs?
According to The Independent, before 2010 just 800 people tackled the challenging hike to Trolltunga each year, but today, it is estimated that more than 80,000 are hitting the trail, making it one of Norway’s most popular hikes! At certain times of year (June to September), there are now queues to step onto the rock and take that famous ‘not-so wilderness picture’!
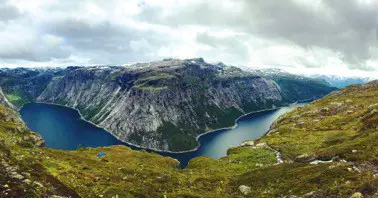
So, while many hikers today travel to Trolltunga simply to snap that famous pic, the scenery along the hike to Trolltunga is absolutely breathtaking, completely worth the visit and not talked about enough!
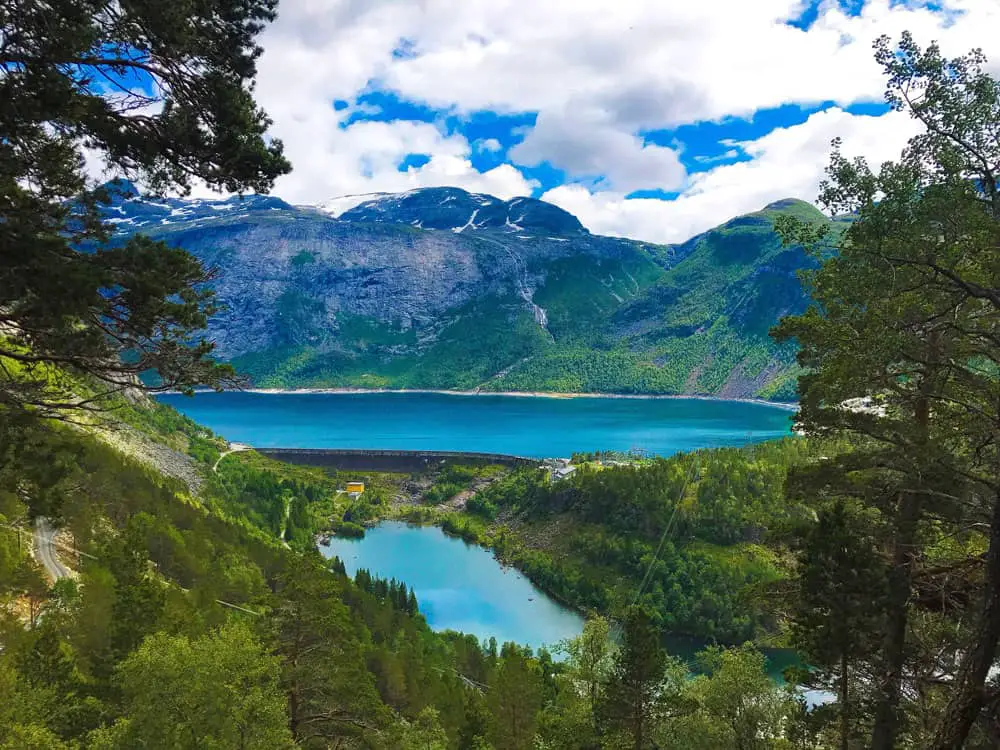
The tranquil, blue waters of the Norwegian fjords will be an image imprinted in my mind for a lifetime. No matter what time of year you visit, waterfalls cascade down from the snow-capped mountains and icy glaciers make for truly jaw-dropping scenery. Although Trolltunga is impressive, these kind of photos are much less common on the ‘gram!
This hike is truly like no other in the world. We decided to maximise our time and embrace the entire experience by camping at the top of Trolltunga. It was a truly unforgettable experience and one I’d recommend for all, providing you have the appropriate alpine camping gear. (It gets super cold at night at Trolltunga, even in the peak summer months!)
About Trolltunga Rock
Trolltunga, which translates to ‘Troll’s Tongue Rock’ in English, is located in the South East of Norway. The rock sits 700 metres (2,300 feet) above Lake Ringedalsvatnet and the hike to get there, from the small village of Skjeggedal, takes around 10 hours. The hike should only be attempted by seasoned walkers with a good level of fitness. Despite the precarious position of the rock and the increasing amount of visitors in recent years, there has been only one recorded death on Trolltunga, a 24-year old Australian woman in 2015 who died posing for a photo.
How to get to Trolltunga
You will need vehicle access to get to the village of Skjeggeda. To get there you will need to drive to Tyssedal (6 km from Odda) on Route 13. Then, follow signs to Skjeggedal and Trolltunga. After around 7 km, you will reach the parking lot in Skjeggedal. The main car park is in Skjeggedal, which is also the starting point for the hike to Trolltunga Rock. If this car park is full, you can also park at Tyssohallen in Tyssedal.
At Tyssohallen in Tyssedal, you may see signage claiming that there is no availability for parking at Skjeggedal. I would highly recommend continuing the journey to Skjeggedal to check this out for yourself as there is a high turnover of people departing throughout the day. If this car park is full, then park at the Tyssedal car park and either hitchhike, Uber or taxi to the start of the trail, which is 6 km away, simply to save your legs! (You will need all the leg power you can get later on!)
The parking at Skjeggedal car park costs NOK 300 for 12 hours (Approx. 27 EUR) and 600 for 12-24 hours (Approx. 54 EUR). In comparison, the parking at Tyssohallen in Tyssedal costs just NOK 150 (Approx. 14 EUR) per day. The parking fee is used to finance public facilities in the area.
Trolltunga Hike: Fast Facts
- Hiking Season: If you want to hike independently, the only time you should attempt this is from mid-June to mid-September when the conditions are less icy. From March 19th to June 15th and from September 15th to October 15th, it is recommended that you hike with a local guide who knows the trail. It is not recommended that you hike during the very cold winter months, which occur from mid October to mid March.
- Trail Length: 27 km in total. (13.5 km one way, 27 km roundtrip) –> Depending on the time of year and the conditions, the first/last kilometre of the route might need to close. This is because it can be too dangerous for hikers to descend when icy. If this happens, you will need to walk the road route which adds an extra 5 km on to the journey.
- Duration: The trail can take up to 10-12 hours in total. (Allow around 3.5 hours one way if you have a high fitness level or 5 hours if you have a moderate fitness level. Hikers looking to take their time and really appreciate the scenery should also allow for around 5 hours.) Either way, you should start your hike before 10 am in the summer season and before 8 am any other time of year to allow enough time to finish the trail in daylight.

The image above shows the Trolltunga hiking seasons and advises trekkers when to hike, depending on whether they want a guide or to visit independently. You should consider this carefully when planning your trip to Trolltunga. Check out Trolltunga Active if you require a guide for your trek.
What to wear to hike Trolltunga
In this part of Norway, the weather can be cool year round (especially at night time) and it’s common for it to be windy at the top of Trolltunga, even throughout the peak summer season (July-August), so ensure you prepare appropriately!
The terrain can be rough and rocky so you will need sturdy hiking boots if you are going to attempt this trek. If you can pick up some GORE-TEX waterproof boots, these would be ideal as you will also be required to cross streams and there could be snow!
Pack yourself some warm thermals, a beanie and a windproof jacket to maximise your enjoyment once you are at the rock. Don’t let the cold and wind spoil your moment! You have walked all that way so you certainly deserve some great photos and a rest with a view!
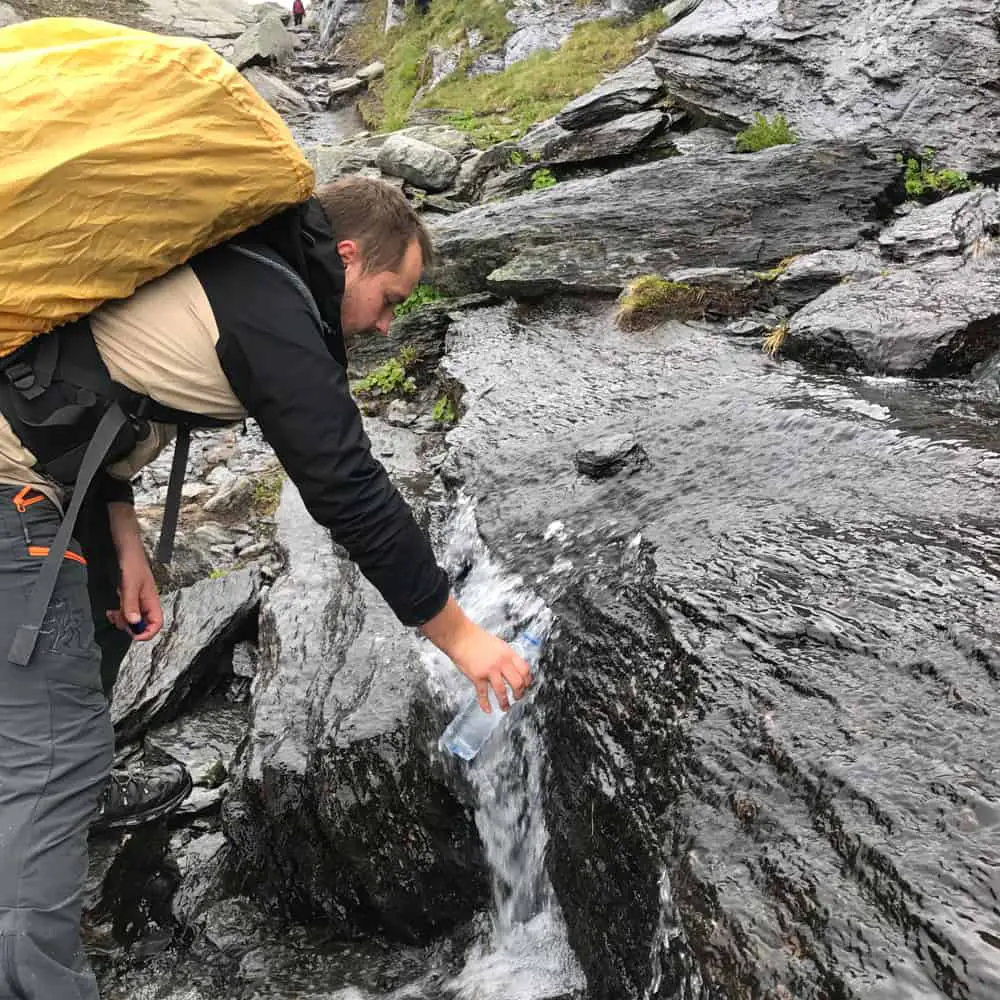
Waterfalls and freshwater streams are commonplace along the trail so there are ample places to refill your water bottle. This will save you from needing to load up like a camel – your back is sure to thank you later!
Trolltunga Track Notes:

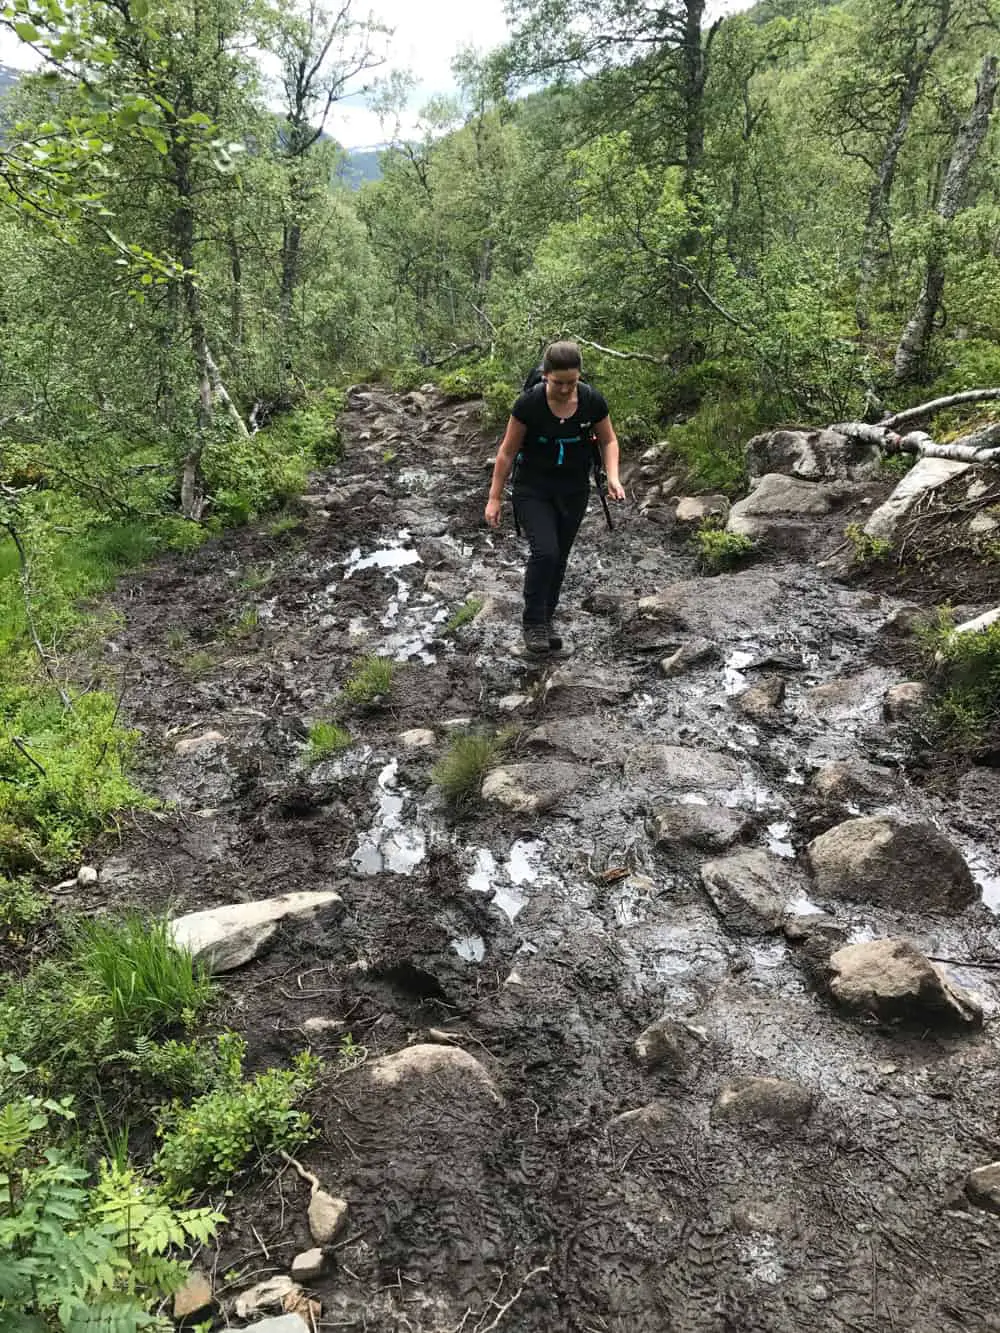
0-1 km (30 mins): Steep incline, rocky, muddy
We had been advised prior to departing for the hike that the first 1 km was steep, but I just don’t think my back (carrying an overnight pack) had accurately anticipated how hard the climb would be! I will forewarn you that it is steep, with a tough incline.
The entire first kilometre comprises this challenging terrain but luckily, this is the hardest part of the trek. Believe me when I say, your heart rate flies from resting to workout instantly! (I would rather talk it up and you surprise yourself than you feel massively overwhelmed!) Please also take into consideration that our hike was done with overnight packs containing camping gear, food etc. so we had an added degree of challenge!
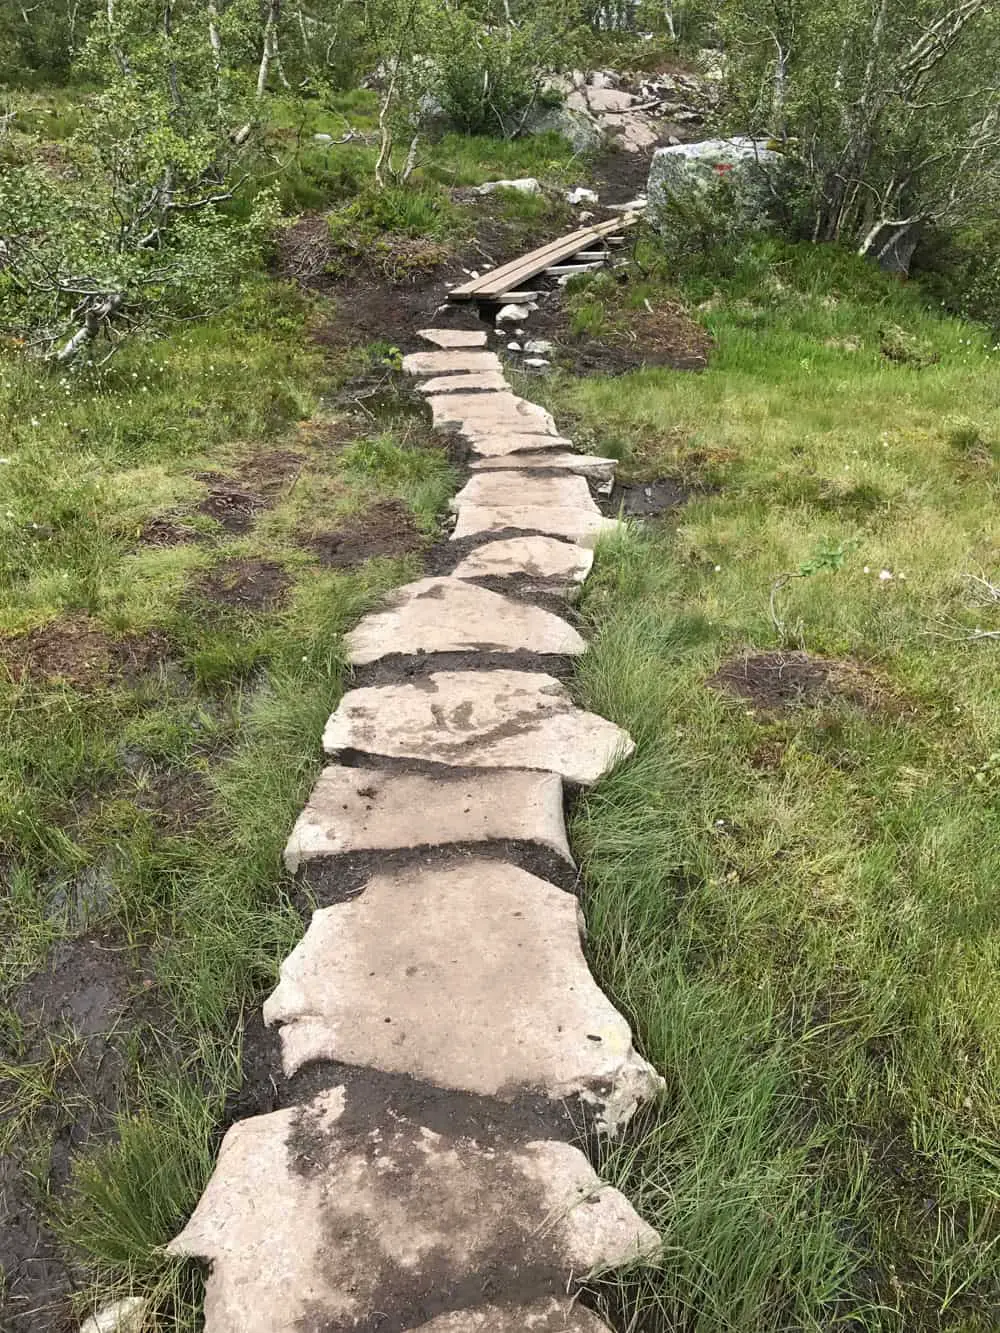
The track is clear to follow along stone stairs. Further up, there are ropes and chains attached to the rocks and trees to help support and guide you. There are rest stop benches for you to relax along the way and if you turn around, the views of the lake and fjords are lovely. If you can get through this bit, you will be fine. You’ve got this!
1-2 km: Muddy, rocky, undulating
Kilometre 1-2 is a breeze compared to 0-1! Here you will find a small stream with clean running water. The track flattens out, however, it is still really muddy and rocky and you’ll quickly find yourself hopping over streams!
There is another river crossing before you start climbing again. The track is surrounded by lush greenery and grassy areas. The rocks act as stepping stones through the mud.
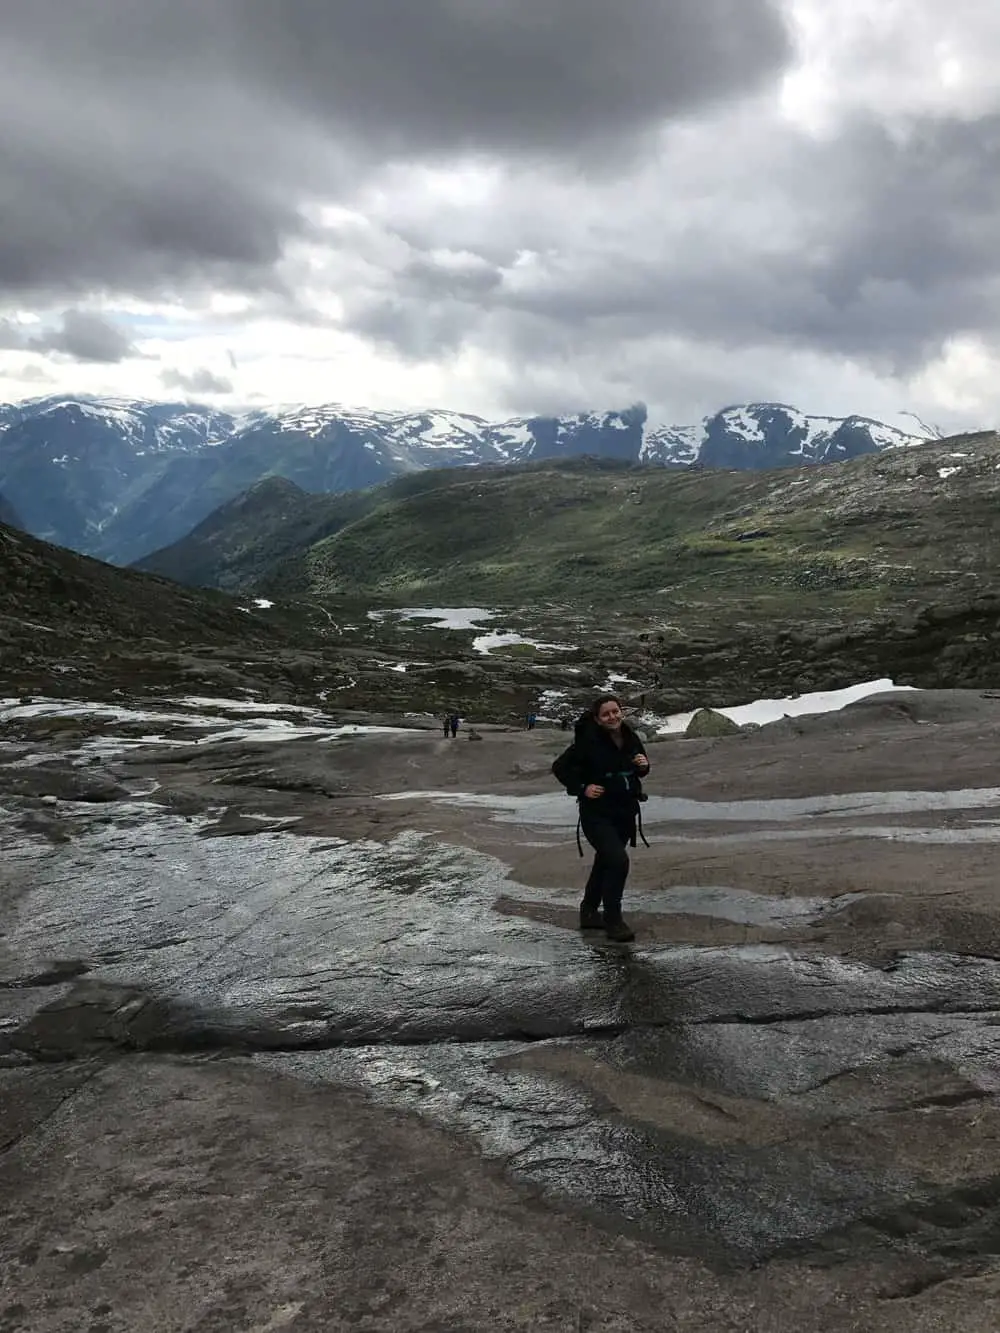
Around the 1.5 km mark, you will reach a plateau. Sigh! Breathe! The rocky pathway undulates so watch your step. From here, look up and take in the great views of the snow-capped mountains.
2-3 km: Beautiful scenery, plateau before incline
This kilometre is also along the plateau so it is an easy start. Here we saw some kids selling ‘Trolltunga pancakes’ for 10 NOK so take your coins and grab a sweet treat on your walk. The boost of sugar will come in handy as you’ll soon need your energy back!
There are multiple creek crossings prior to the second ascent. This ascent begins just before the 3 km mark. It is a steep incline (although nothing like your first kilometre), along a compacted stone dirt path with large sections of rock stairs. It zigzags all the way up the mountain. At the top, we got our first glimpse of snow up-close which made for some fun snow play penguining down the glacier!
4 km: Glaciers, creeks and views
You made it! Here you reach the top of the second ascent. This area is a rocky plateau which is a saddle between the two peaks. As the snow melts, dozens of small creeks form down the mountain. This water is as cold as it is clean and perfect to fill up your water bottle.
4-5 km: Easy, mountain views
This section is a relatively easy walk with short climbs and downhill areas where you will stroll between small lakes. As you reach another small peak and begin descending, you can begin to see the sheer cliffs of the fjord.
5-8 km: Breathtaking views, undulating path
This is a longer section where you continue to wind along the cliff through undulating terrain. There are steep parts of this track and some sections are muddy. This is why you need to wear decent hiking boots for this trail! You will hop across some small waterfall creeks using rocks which act as stepping stones.
The views of the blue water below and waterfalls cascading down the cliffs are breathtaking. The landscape here is postcard perfect and this is a great place to stop and take it all in. Have a rest here and admire the outstanding nature Norway is offering you.
8-9 km: Tough ascent, cliffs
You now pass down another hill with snow and ice to your left. The path crosses over a creek before another tough ascent along the edge of a cliff begins.
The path is wide and safe so there is no risk of danger. However, do take your time to take in the great views. You climb from the 8.5 km mark until you reach a short-lived plateau.
9-11 km: Ascent to Trolltunga
You can actually see Trolltunga from here, although it is much easier to identify once you have seen it up close!
Along this section, you’ll walk over large rocks, through snow and across streams. The track becomes a bit vague here as the end is in sight and people tend to veer off. We walked to Trolltunga via a small stream which is the easier path to the rock. Hug close to the rocky mountainside where there is a waterfall to refill your bottle.
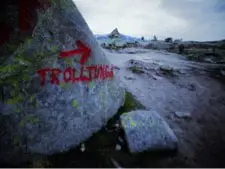
Continue down past a glacier, before walking along the top of one until you reach the rocky flat. Keep your eyes peeled for the red T marker on rocks. This will direct you to an easier route leading to the destination.
You will notice a large dam to your left as you climb up over rocks, ascending to Trolltunga. Continue following the red T’s which will lead you to Trolltunga rock. Once you arrive, give yourselves a high five and take in the beauty of the fjords and the epic scenery around you!
What did you love about hiking Trolltunga? What section was most challenging for you?

Rachel Pope
About The Author: Rachel Pope is the founder of Spirit Quest Travel, an adventure travel blog focusing on mindfulness and active living. She is an outdoor enthusiast, yogi, storyteller and wellness advocate who is happiest when immersed in nature.